Search This Blog

Showing posts with label brown. Show all posts

Friday, July 19, 2013

FDFF Challenge: The Great Outdoors!!


Hello friends! It's Friday again and you know what that means...another fabulous challenge over at Frosted Designs! This time we want you to create any OTP project, layout or card with the theme of "The Great Outdoors". Which should be easy right, it's summer so we all get out and enjoy the sunshine when we can. I happened to have done quite a bit of traveling this summer with our recent cross-country move so I had plenty of good photos to choose from. I actually printed 100 instagrams last week, most of them were from the trip, so I can't wait to scrap them all! It was hard to decide on which ones, I actually plan on making an 'entire 'road trip' album but I chose a few of my favorites for this layout I call "Wilderness Girls". It's kinda funny though we were all in Girl Scouts together back in the day, but it makes me think of that movie from the 90's about the Wilderness Girls...hmm I should find that on Netflix soon and save it for a rainy day. That was one of my favorite movies! Anyway, onto the good stuff, photos of my LO for today!!

 Here are a few close ups. I had fun digging back through my stash since the move. I did alot of purging when we left, had to make room for more important stuff, but at least I know it went to a good cause. I found some old BG out of print papers and combined them with more BG papers from a kit I bought just before the move called 'Clippings'. I thought the greens and whites went really well together. To do my layering, I used some Prima Trim, paper piecings, large flower, PP button, stickles, a bit of washi tape and a few other things to tie it all together. My photos aren't the greatest I took them at night so I had to brighten them a bit ...not too much light when you are up scrapping late at night like I usually am!!


 So that is about it for today, I hope you have a great weekend. I will be working but I get my 'weekend' Tues Wed so looking forward to getting back into a routine with all out of town company gone. It was fun to see them and show them our new place but the preparing beforehand can be so exhausting!!! Although it did motivate me to pretty much 'finish' out little place. All we are missing now is carpet for the bedroom, which will come soon I hope. I can't wait to share pics when the light is good in here in the next few days and everything is done!

Please come join us for this awesome challenge! All you have to do is link up your project on our sidebar at www.frosteddesigns.blogspot.com no later than July 30th to be eligible for the DT picks for Top 3 and our Grand Prize winner gets some awesome stuff from Molossi as well as Spiegel Mom's Scrap Shop- our  wonderful sponsors this time!! Can't wait to see what you come up with! Here's too a crafty weekend and normal routines :) Cheers! Until next time~VV


Thursday, December 13, 2012

Altered Initial Tutorial

Good morning everyone!! I hope your December has gotten off to a good start. I know I always love this time of year. Giving gifts, especially handmade ones for me are the best part of Christmas! A great seg-way into our post for today, I made an altered initial for my sister for her birthday this year. I always feel like I don't really know what she wants because well she pretty much has everything, I could buy her like an Amazon gift card but well that's kind of impersonal, and I am her crafty sis, so it has to be something good!
Here is a pic of the original initials we did at class in May:


So I orginally took a class a few months back at weekend crop in Gulfport, MS for this initial. I bought an extra kit thinking I would do the same style again for Kelli and give it to her as a gift, but after looking over the papers and embellishments, I realized that they probably weren't really her style. The blue, white, silver and peacock feathers are really cute but wouldn't match her house decor. So I scrapped the whole kit- to use on another project, except for the intial! The first thing I did was hot glue a tube to the back of the letter to give it more stability when standing. I also thought that you could add some dried flowers or something for height when using it to decorate! Here are some pics and step by step instructions (forgive me for not taking a pic for each step!!) Pardon these pics too, I had to take them all inside because it has been dreary out!

Next, I chose my papers and traced the letter on it then cut it to fit. I used Martha Stewart crafts glue to adhere it to the letter, then my exacto knife to trim and get a good clean edge. These are some of the products I used: red chevron paper- The Paper Studio, element stickers from Carta Bella 'beautiful moments' line, mod podge in Glossy, Tim Holtz distress ink in vintage photo, StazOn Jet black ink, and chandelier stamp by Heidi Swapp.

After I had my paper down, I chose one of the larger element stickers and placed it on the letter. Then I inked and stamped the Heidi Swapp stamp over top of that. This is how it looked in that step:


 The next thing I did was take my ink blending tool with the TH ink in vintage photo and ink all the edges really good. Making sure to get in all the crevices and over all of the edges.
 Next I did a light coating of mod podge over the whole thing smearing it pretty thin with my fingers, then dried it with my heat tool. After that, I cleaned my chandelier stamp and used my Stampendous clear embossing ink and restamped over the image again, then sprinkle over it generously with UTEE and hit it again with the heat tool. This is what it looks like before you heat it:
 And this is what it looks like after you heat it:
 So for the next few steps I forgot to take pics, but basically I just started layering on some more embellishments. I fussy cut out of some paper a large key, and from Tim Holtz paper I cut out a clock and made it have hands with a brad in the middle. I also layered on a few more stickers from the Carte Bella elements sheet. After I put my papers and other stickers on, I did another thin layer of mod podge and I heat embossed the chandelier again. then I started to add my other elements:


 I used vintage buttons, 2 kinds of washi tape for the sides, a resin rose, a metal key hole from Tim Holtz, some ribbon and a layered flower with a pearl. I also stamped another few small stamps from my Prima set with the jet black StazOn, a small bird and a spoon. This is what it looked like after I was done embellishing:
So I hope you have enjoyed my post today! It was so fun and quick to do this project that I am thinking about doing a few more for my lady friends at work, if I can get going! Christmas is only 14 days away!!! I don't think it would take me too long. We'll see how this one goes over for my sis, and then I guess I'll decide. Until next time friends, keep scrapping and PEACE Y'ALL!! ~VV

Monday, October 15, 2012

hello bungalow!

Hello friends! I'm here today to share with you a layout that I did for my LSS, Scrapping Frenzy. I used some new papers from the 'Prep School' line by Authentique.  The photos are instagrams from our arrival at our 'bungalow' for the weekend on the lagoon side of the bay in Gulf Shores during Hangout fest weekend (May of 2012). We were so pumped to get there and kick off the weekend right! We were asked to interpret this sketch which in it's original form is 8.5 x 11". This was the sketch:


I did my layout in a 12x12 format. I used this sketch as a rough idea, putting a square behind my photos instead of a circle, also I put my banners and title oppisite, banners on top and title on the bottom. Also I moved my journaling over to the side of my photos. Overall I'm really happy with how it turned out and that I was able to use up the almost the last of my Pink Paislee woodshop letters for my title! Here are a few photos:


 A few closies: I layered my cluster first with a scalloped circle punched out of word paper. Then some raffia ribbon, a few felt circles topped with a button and tied with twine. The Sam Adams bottle cap is an inside joke on these pics of my fiance and his friend Mike. I added a second small button and a few tiny flowers behind the ribbon that I sprayed with the new Dylusions ink spray by Ranger in 'melted chocolate'. Off to the side there is a small shipping tag, more buttons, twine and flowers.


I used a bit of washi tape along with some more flowers and resin embellishments for a smaller cluster near the bottom of my page. And my favorite part of this page...the banner! I put buttons and some gem drops on top of the pennants to add texture. I love making banners I swear besides chevrons, banners are my other favorite trend in scrapbooking right now!


Ok, well that is all for today. I hope I have inspired you to make a banner or use a bottle cap on your next scrapbook page! Thanks for stopping by, I'd really be spoiled if I got a comment or two?! Until next time, Peace Y'all~ VV


 Supplies List:
 brown cardstock,
brown twine, 
wooden buttons,
 Pebbles Let Freedom Ring Collection - James Madison
PinkPaislee Old School Collection - Prep School.
 'washi tape
Tim Holtz distress ink 'vintage photo' and 'tea dye'
Pink Paislee woodshop letters and heart
Martha Stewart crystal clear glitter
Martha Stewart glittering glue
Raffia ribbon
vintage buttons, Sam Adams bottle cap
Prima Marketing flowers
Jolee's boutique resin embellishments
mini shipping tag- Echo Park
mini dew drops by the Robin's Nest
sticky thumb pop dots
mini pearls- Michael's
distressing tool
mini white flowers (inked) by Recollections
Dylusions ink spray by Ranger in 'melted chocolate'


Friday, October 5, 2012

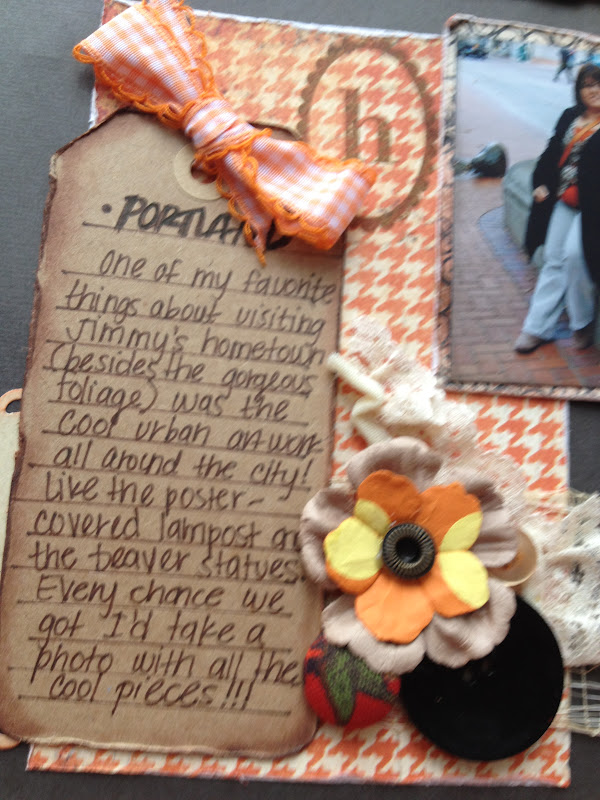
Pieces of Portland {Authentique Enchanted Collection}


Happy Friday everyone! I hope you had a good week and are looking forward to the weekend. I wanted to just say that I had a FABULOUS time at Convention last weekend with all our customers and my special design team ladies! There were lots of laughs, plenty of snacks, and tons of inspiration! It was truly a great weekend, so thank you!
Ok, so I am sharing up with you today a layout I did using some of the new  Authentique 'Enchanted' collection papers, perfect for fall/Halloween/harvest. Even though these lean more towards Halloween, I was able to make them work for my fall pictures by grounding them with a dark brown cardstock background page. I had alot of fun using Sam's distressing tool on this layout, and I will be buying one very, very soon! Here are some pics:


I really liked both sides of all the papers I got from this collection, so I actually used both sides of all the papers by cutting them into different sized rectangles and piecing them together on my page. Of course before I glued them down I distressed and inked all of them. Also for each one of the rectangles, I did a different technique. I misted one with Smooch, I stamped one, I heat embossed/UTEE'd another one just to add more texture.

 Here are a few close ups, first up is my favorite, the BANNER! I have become obsessed with making these for my pages these days, don't know why! Could it be cause they are so stinkin' cute and easy to make?!! Also I added some mini pearls for a girly touch.

Next up is another new obsession on my pages... WASHI TAPE! It is so versatile, and it always adds just that bit of layering that you need. We have tons of different washi's available at the store now if you weren't able to get your hands on some this past weekend...come check them out! On this page I used 2 pieces near my stamped image.


And last is another view of the whole layout. I had so much fun making this one, if you like the papers I used be sure to check out the 'Enchnated' Collection by Authentique today at Scrapping Frenzy, it would be the perfect way to kick off your Halloween or fall project plans!


Until next time, enjoy your weekend! I hope you get a chance to scrap a bit this weekend and enjoy some laughs too!
Scrapping Frenzy Supplies Used: Authentique "Enchanted" collection- 'haunted' and 'glowing'. Echo Park- 'Note to Self' 6x6 paper pad. Dark brown, Kraft and cream colored cardstock. Colorbox chalk inks- chestnut, pumpkin spice, and black. Smooch Spritz by Clearsnap 'Pralines n' Cream'. Dylusions Ink Spray by Ranger 'melted chocolate'. Tim Holtz memo pens and Tim Holtz distress ink in 'tea dye'. buttons, washi tape, ribbon, raffia ribbon, and brown paper bag. Brown Zig writer, Glue dots, Sticky Thumb pop dots, watermark embossing ink.
Other supplies: 'UTEE' Ultra Thick Embossing Enamel, mini stick on pearls, flowers, Purple Pumpkin fabric buttons and crochet doily, fiber scrap from my stash.


Sunday, September 23, 2012

asian.elephant.@rt


Happy Sunday everyone!! I am here today with a quick share of a layout I did using some more lovely Graphic 45 papers and Thickers for my LSS, Scrapping Frenzy . These are some more photos of my trip to Portland, Oregon with my fiance' in Nov. 2011. It is almost a year later and I am still scrapping them! Came home with over 200 pics from that trip! I was inspired by the swirls on the decoration of the elephant statues which were similar to one of the papers. I used another larger strip of more muted colored paisley paper to break up the polka dot background paper. I also backed my photos in dark brown and cream cardstock and inked all of my elements. Here is a look at the whole layout:


  used the orange and white dot paper from Graphic 45, as well as fussy cut some swirls out of the other paper by Graphic 45. To add dimension, I heat embossed the fussy cut swirls with UTEE. Also I layered another piece of dot paper by Graphic 45, some cheesecloth, a piece of shimmery beige cardstock, and a piece of seersucker fabric under my photos. I also cut a large circle out of cream cardstock and added a long strip of paper- scrap of Carta Bella paper from my stash for more color. Then I used flowers, buttons, and a few resin embellishments to make my clusters. Here is another shot:


 For the title, I used 2 different packs of Thickers, which are quickly becoming a fav! Alright well I will leave you with one more photo for today and that’s it! I hope you have a great weekend and enjoy this cooler spell we’ve been having!


Oh, and PS if you haven’t already signed up for the wonderful CONVENTION hosted by Scrapping Frenzy going on next week, it’s not too late!!!! It’s going to be a great time! Lots of fun classes and lots of inspiration from the design team of course! Call the store today to reserve your spot or check out our Facebook page to get all the info! It’s going to be alot of fun!!! I am excited to be teaching a class, also hang out time with some really great ladies and of course creative therapy... I need some 'me' time! Until next time friends, Peace Y'all~VV

Supplies: Graphic 45 papers, Carta Bella papers, cream and dark brown cardstock, colorbox chalk ink in brick, pumpkin, butterscotch. Smooch Spritz in tea party and pralines and cream. Sticky thumb pop dots, vintage buttons, resin elements by Jolee's, flowers by Prima, pearls by Michael's, scraps, fabric and cheesecloth from stash

Thursday, September 6, 2012

A Girl and Her Coffee... {Graphic 45 LOVE}


Hello friends! Can you believe it's already September? Fall is probably my most favorite season, there are lots of things coming up to be excited about (besides football) ! First is Scrapping Frenzy's annual convention coming up at the end of the month! There are going to be fun classes to take and of course little goodies and inspiration from the Design Team, I hope to see you there!
Okay, well on with my post for today. I did a layout today using some new papers from Graphic 45. At first I thought it might be difficult to pick which ones to use because the patterns on them are so intricate but I mixed some of the same color palettes and threw in another color so my photos would pop off the page. I also used some instagram-sized 3x3 prints that I recently ordered and I love them cause they are perfect for putting more than one picture on a page! They are the perfect size! So here is my layout:


So I came up with the idea for this layout because well... I LOVE COFFEE! I have to have at least one cup every single day. Sometimes I think it's really important to scrap the little everyday things in your life, because years from now when you look back it will be fun to remember some of those random moments! Here are a few close ups:
I used some Smooch first to add texture to my background, two different colors- pralines and cream and caramel mocha. On top of thatI started layering my Graphic 45 papers and my leftover Starbucks bag. I also backed all my photos in kraft paper and some teal colored cardstock and placed them on the page in the arrangement I liked. After that, I started building my clusters. I knew I wanted room for a fun title at the top, so made my clusters work around that.

For a fun twist on my clusters I fussy cut some of the little 'girl' from one side of the Graphic 45 papers and decorated her a bit. I colored in her dress in coffee bean brown to make it go with my title. I also added some stickles in gold glitz.

I also added to the bottom a piece of vintage lace, some tulle, a strip of basic grey paper (out of print my fav!!) and some resin embellishements. The little coffee girl was my inspiration for the color palette of the page, I pulled the teal and blue and yellow/gold from her and put it all over the page.
 Thank you so much for stopping by today! I hope I have inspired you to scrap some of your 'everyday moments'. Until next time my scrappy friends, Peace Y'all~VV

Supplies Used: Graphic 45 "Malt Shop Collection" 'On the boardwalk' (I used both sides) , Graphic 45 "Le Romantique Collection" 'My Beloved' (swirly side of paper), cream, teal, kraft, and chocolate cardstock- Bazzil, cardstock cutouts by Crate paper- blue roses, & sign, circle. Colorbox cat's eye inks in blush, mint, and chestnut, Smooch Spritz by Clearsnap sprays in pralines n' cream and caramel mocha, Queen& Co twine, Stickles in gold glitz, Glossy accents, sticky thumb pop dots, Brown Zig marker, Cricut Cartridge in 'Don Juan'. paper and felt flowers, stick on pearls, tulle, chipboard circle and flourish-Prima, vintage lace, leftover Starbucks bakery bag, felt circle, spotty button and resin elements-Purple Pumpkin crafts