Search This Blog

Showing posts with label distressed stickles. Show all posts

Tuesday, March 4, 2014

All about Mountains!

Hi friends! I hope you've had a good start to your week. I have been off for the last 2 days and have been super busy...cleaning house, getting ready for showings, going to check on our new place that we get to move into in less than 2 weeks! I did get a little time to myself too, yesterday I went for my first solo hike since we've been in Oregon, just a short easy one in Mt Tabor park, but it was very refreshing and renewing, felt good to get some sunshine on my face! It has been super wet here latley. I also got a little free time today to start my next art journaling page. I was once again inspired by Sundays with Sandee over on the FD blog, if you haven't had the chance yet to watch her videos, you have to check them out! As soon as I saw  her pipette painting tutorial I knew I had to try it. I ordered a few more supplies from the Frosted Designs store, and in less than a week I was on my way! I also challenged my Aunt Vicki, who is my lifelong creative inspiration (very much like my mom!) to try it out. We are supposed to share our creations next week when we do our monthly facetime chat. I couldnt wait till then to share cause I was so proud of how it turned out, so here it is:


Also it doesn't hurt that this is probably my favorite Dr. Seuss quote of all time....

"Today is YOUR Day, Your Mountain is waiting, so GET on Your WAY!"


I used basically the same technique as Sandee did for my rough lines. I didn't remember to gesso the paper first or anything though so intial ink colors spread a little more than I hoped. At first I didn't think I would like it, it took a long time to try and I think I used too much water, but after I went back over the lines several times with a fine tip marker it grew on me. I also gesso'd the back of the pages cause they were worn so thin from me painting and smearing..that also took a while to dry and i tried my heat gun...needless to say I'm not a super patient person! LOL! I had to cover over a few places on the back too with tissue tape just to make sure the front wouldn't tear through....not really sure what I will end up doing with those pages, but I will know next time to gesso first!!


This is what the back of the page looks like, the inks bled through even after I gesso'd. It kind of made a need look but for functuatlity purposes I had to add the tissue tape.


It was good to experiment and try a new technique. It really gets your mind going. I have a few more projects to finish before I can start packing up my scrapping stuff. So excited for a bigger place where I will actually have an entire room to myself again instead of a dedicated corner of the laundry room. Plus I will have a large window above my desk!!! I am soooo excited for that, I just hate packing. The only good thing is that we hardly have any stuff compared to what we had in Alabama, we did a major purge before our 3000 mile trek so it should be easier this time. We get the keys on March 14th. Guess I better get going since I'm under a deadline.... see you next time! Thanks so much for stopping by todayI love all your comments!!!

Here are just a few pics I took on instagram during my hike, it was absolutley gorgeous yesterday and I am glad I got to enjoy it for a few hours outside!!! These are all from the base heading up to the 'summit' of Mt Tabor which is just a few miles from my house. It probaby took me about 1.5 hours to get to the top and back down on the easy trail which has partial stairs. It was alot of fun and I can't wait to go again on my next day off if i am not up to my ears in packing!!!


Happy Tuesday Y'all!

Wednesday, August 15, 2012

hello there...i love you! {SF August Sketch Challenge}

Hi everyone! I am very excited to share a new layout I did recently for my LSS, Scrapping Frenzy. I have to admit, I wasn't a huge fan of the Halloween themed papers at first, thinking how am I going to use these in a non-Halloweenish way? But I really put on my thinking cap with this one, we also were provided with this sketch as our inspiration:


So here is my take on the sketch:
 I did make a butterfly like in the sketch, as my focal point, and there's not much else I didn't do except I added more paper strips to the middle and clusters of flowers instead of hearts and stars. Also I put my 'swirls' in different places too. I have to say, I am really proud of how this turned out! It's an unexpected color combo but it really works and I will definatley think about how I can repurpose my
old Halloween papers in the future!!!

Okay, so since my LO is currently on display at the store I don't have any closies of it for you today...but maybe I can snap a few when I get it back! Overall I am really really happy with this and couldn't be more surprised by this color combo!! I encourage you to think outside the box when digging through your paper stash... I was inspired originally by the orange and black 'eyeball' paper because it reminded me of a pattern on a butterfly's wings, so I turned it sideways and started from there...of course I had to glitter it up a bit and rough up the edges, but it turned out great! My second favorite thing on this LO is the Donna Salazar blank canvas that I misted with Smooch in River Mossy and Silver foil...it totally absorbed the color and was a piece of art just by itself!! Well I hope I have inspired you today to dig through your stash and get scrapping...pay attention to design and pattern, you never know what you can use holiday themed papers for!! Until next time, Peace y'all~VV


Supplies: Halloween Patterned papers by Reminisce, 6x12 sheet Halloween paper, 6x12 bracket die cut black cardstock, a black shipping tag, a square of Donna Salazar Blank Canvas, a strip of striped ribbon and a length of black and white twine by Queen &Co, Basic Grey papers- stripe and black flower strips, Smooch Spritz by Clearsnap in River Mossy and Silver Foil. Tim Holtz paper distresser, Colorbox chalk ink cat's eye in iced jade, grey whale, and toffee. Martha Stewart holiday glitter 'tinsel', American Crafts black vinyl embellishments townhouse', Purple Pumpkin resin rose, fabric button, black crochet doily, vintage buttons, Teal paper flower and black roseby Prima Marketing, Tim Holtz distress stickles 'milled lavender',  sticker sentiments-unknown.

Sunday, July 15, 2012

{Inner Beauty} July Sketch at HBS

Good afternoon friends! I am here today to share another non-DT layout I did late last night, I had caught the creative bug after going to our meeting at my LSS, Scrapping Frenzy. We were supposed to crop afterwards but everyone was pretty tired except me! So I came home and unpacked and got organized for my next few weeks of submissions, and decided to finish the LO that I started at the store. I am really, really happy with the way it turned out. I was inspired once again by a fellow DT member, Suzanne, who is the master of layering on her LO's!!! She puts everything under the sun on her pages...lace, freezer paper, cardboard, burlap, cheesecloth...LOL! Well I went digging through my stash and found a few things to layer, and I really wanted to brighten up this green/brown/black paper so I added some pinks in, to tye in my photo of my cousin Kate. I used the July Sketch that's up over at Handmade by Suzanne, my first submission for their challenges, but the winner gets a $40 voucher!! WHOO HOO!! Let's hope I win, there are sooo many awesome pages in their gallery!! Here is the sketch:

And this is how my LO turned out:


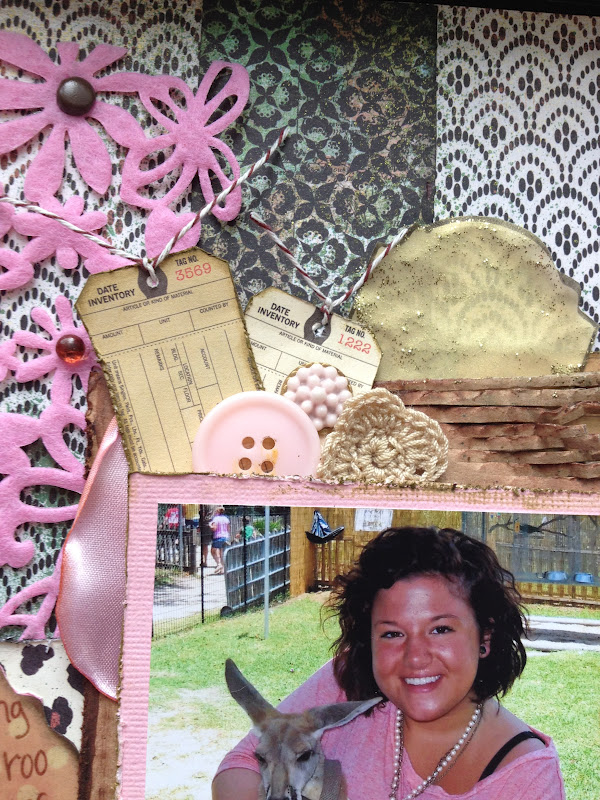
I decided to try my hand at a little layering of materials again. I used cardboard, several patterned papers, a shipping tag, a felt border, some satin material from a flower I took apart, buttons, and of course other yummy stuff. I have been holding onto some of these Basic Grey papers for a while, and I liked mixing them together, but I wanted to tie in the pink like her shirt in the photo, so I added the border and went from there! I really like how the unexpected color palette of browns, greens, blacks and cream mix with the light pinks! Perfect for the photo :D Here are a few close ups:


So that's all for me today. I hope you had a great weekend... I had to work but I also got a free day and was able to fit in a little 'relaxtion' time with friends which is always good for the soul, so I'm feeling great heading into the start of this week! I'll be back again soon to share another sketch challenge and maybe a wedding craft or two :D Until next time, Peace y'all~VV

Supplies Used:
pink cardstock-Bazzil
Echo Park 6x6 mini papers 'Note to Self'
leopard print paper- The Paper Studio
Basic Grey- Ambrosia 'Quince'
Basic Grey-Out of Print 'Odds 'n Ends'
pink felt flower border- Queen & Co
manila shipping tag
brown baker's twine- Queen & Co
pink and gold pearls- Michael's
Thicker's brown foam alphas
dew drops by The Robin's Nest
small circle, resin embellishment, silk piece, cardboard, vintage buttons, flowers, and brads- mystash
fabric button- Purple Pumpkin Crafts
Ranger Stickles in gold
Tim Holtz distress stickles - peeled paint
Colorbox cat's eye inks in chestnut, dark brown, black, and dark moss
Smooch Spritz by Clearsnap in 'emerald sprinkle'
brown ZIG marker
Tim Holtz distress marker in 'picket fence'


Friday, July 6, 2012

I {ADORE} this girl...

Good morning! I am super excited that I have another share for you today and even more excited that it is non-DT related!! Which means I got some EXTRA scrapping time in this month, which is great!!! I have been holding on to this pic of my little niece for a long time, she's a bigger now, but something about it just struck me, I knew I needed to do a special page using it! And I decided to print it in black and white to add even more drama...my favorite part is the expression on her little face...it's priceless!!! 
Ok, here are the pictures:


I actually used the cardboard/paper packaging from a pack of Prima flowers to put behind my matted photo.  It had such a cool design with the script and the clocks that I thought it would be worth saving!! 


I also made a bow using some black tulle and white meshy stuff. I also wanted more or less a monochromatic color scheme so I stuck with black, white, greys, and shades of orange/peach to make sure that the photo was the star of the page!
 And the last close up, my favorite and only little niece, Zoe!!! I love her!!

Okay, well short and sweet today. I hope you enjoy your weekend! I will be working the whole time but I'll be off again Tues and Wed and then it will be back to some creative time!! Until next time, peace y'all~VV

Supplies List:
Basic Grey 'Ambrosia' collection "marmalade"
cream/black script background paper-unknown
black shiny damask paper-DCWV wedding collection
black tulle, white mesh, seersucker fabric, vintage buttons-my stash
Tim Holtz paper distresser
Tim Holtz distress stickles 'dried marigold'
Clearsnap Smooch Spritz 'silver foil'
Clearsnap Colorbox cat's eye inks 'butterscotch'
grey and peach roses by Recollections
decorative music tape by Recollections
Ranger stickles 'black diamond'
Princess Petals florettes by Webster's Pages (tulle flower)
black glitter stick-on border by Studio G


Friday, June 22, 2012

{True Blue Friend} :SF June theme challenge


Hello everyone! I am back today to share with you another layout for June using our color theme for this month which is blue and white! First I want to give you a little mini tutorial about how I created the background for this page and also my inspiration for this page and my 'jumping off point". I actually was really inspired by a LO we have hanging up at Scrapping Frenzy that was made by Suzanne. We were given the same paper in our June DT kit so I took some of the elements from her page such as layering and painting, and translated it to my page. Also I found this photo that was taken in June of 2006 the year one of my best friends graduated from Harvard when the other bestie and I traveled all the way to Boston to see her walk in person! (and visit a bit of course!) It was such a great trip I have alot of memories from it!! Okay, well on with the layout, here is the inspiration LO by the lovely Suzanne Austin!!


For the background, I used some light blue craft paint mixed with crackle medium and dry-brushed it across the background. I wanted to add more 'blue' to the page so that's what I came up with. When that was dry I traced over the paper design with stickles in 'true blue' and 'orange peel'. I let it dry overnight and this is how it came out:
And, going on the layering idea that Suzanne did in the inspiration layout, I used several kinds of items to give it lots of layering for a really funky look! Including some Tim  Holtz paper, cardboard, cream colored cardstock, a crochet doily and lots of other stuff! I really like how it turned out:
 And here are some close ups, just so you can see all the detail!! (My favorite part)


Ok, well that's all I have for you today! I hope you were inspired to funk up the background of your pages and get a little messy with some paint and stickles!!! Enjoy the weekend :D
Scrapping Frenzy Supplies: 
Ruby Rock-It "The Summerhouse" background paper, Reminisce cardstock stickers "the freedom collection", Moxxie "God Bless America" blue paper, cream colored cardstock, Stickles- orange peel, true blue, and TH collection faded jeans, Colorbox fluid chalk ink cat's eye 'brown' and 'butterscotch', Glossy Accents, sticky thumb pop dots.
Other supplies: 
Tim Holtz' 'Lost and Found' paper, Prima flowers, Recollections- teal button, teal resin flower, blue/gold flower, and metal brad.  Air mail sticker, orange glitter ribbon, blue crochet doily-Purple Pumpkin Crafts, paper clip flower-Pier 1 Imports

Thursday, March 1, 2012

it's been TOO LONG + MME challenge

Hello everyone out there in blog land.... I am so happy to be back in a normal routine after a month of craziness at work. Still staying busy, but not as many grueling hours at the store and non stop customers since Mardi Gras is finally over! I was so busy that I didn't get a chance the past 3 weeks to visit anyone's blog or leave any comment love or even read my favorite challenge blogs! And I have missed it so! Like I said I am glad to be back in a more normal routine and hopefully getting my scrappy mojo going again! Wedding plans are slowly coming along...I hope to have a crafty girls day this Saturday with one of my bridesmaids to experiment with a few of the crafts I want to make for the wedding. If we get a few experiments under our belt, and I can snap some photos,I will definitely being sharing them on here!!!! I am going out of town for a manager's conference early Sunday am until very late Tuesday PM so when I get back I hope to become re-inspired...it is travel for work but I always enjoy getting out of the store for a bit and staying in Santa Cruz, California ain't too bad either!! 

Okay, enough of my jabbering...although I do kinda feel like it's been FOREVER! Almost a month since I updated. My last LO that I was working on before the craziness hit was for a challenge over at My Mind's Eye. Unfortunately, I did miss the deadline but I wanted to share it with y'all still cause I think it turned out really cute. I don't have that much MME stuff in my stash, because it seems like every time I get some I use it all up immediately!! So this was the sketch we were supposed to use, as well as the
theme 'YOU' and the other rule was 80% MME products:

And this is what I came up with, titled 'ME and TAZ':
 closer shot:

 And some closies:

 For the cluster of flowers, I used mostly MME flowers and brads, along with a few other Prima flowers from my stash. I doodled around them with brown felt tip pen and added texture with some turqouise beads and a yellow resin rose from PP.

 The title I made with a MME tag and some buttons and brown thickers.

 A close up of the misting/stickling I did to the background paper. Overall I'm really pleased how this LO turned out, and my favorite part is the color scheme!!


 So, happy March to everyone and welcome spring! I hope I have more scrappy creations to share with you very soon!! Until next time, Peace Y'all~ VV

Supplies List:
Turquoise Lush Collection by My Mind's Eye- ribbon, paper flowers, jewel and pearl brads, 
striped paper, & flocked journaling block
Tim Holtz distress stickles- peeled paint
Tim Holtz distress ink- antique linen
Tim Holtz paper distressing tool
Smooch Spritz in gold glow
thickers sticker letters- American Crafts
paper flowers- Prima Marketing No. 9 essentials
yellow resin rose- Purple Pumpkin Crafts
vintage buttons- stash
yellow and taupe cardstock-stash
background paper- unknown


Friday, January 20, 2012

wineloft b'day soiree {get picky sketch challenge #16}

Good evening everyone! I hope y'all all had a wonderful, productive week. I know I have, and I still have a busy weekend ahead, including a bridal show to work on Sunday. I will unfortunately be there to work, not attend the show as a bride, but I am hoping to get to walk around and meet with some of the vendors. My weekend in my retail life isn't until Tues/Wed, but this Wednesday is MY BIRTHDAY!!! It's my last one in my twenties, I will be turning 29. Nothing really special planned except maybe a mani/pedi on Tues, some serious chill/down time, and if we can work it out just a short day trip to New Orleans or Biloxi for the day Wednesday. I am hoping J can get off cause I really want to spend my bday with him!!! 

Speaking of  bdays, I used some photos that were taken this time last year to do the sketch challenge over at Get Picky. It's for sketch challenge #16, and it also requires you to use more than one photo on your LO, which I think is great cause I love scrapping multiple photos.These photos were taken at the wine loft with 2 of my best friends in the whole wide world, J and H. Have known these 2 girls nearly my entire life and I couldn't imagine my life without them in it!!! This was the original sketch:

And this is my take on the sketch:
 As you can see, I did interpret the sketch a little differently. I used a doily as the main background 'circle' shown in the sketch, but instead of doing clusters of more circles all around the photos, I used the tearing paper technique to add more interest to the top of the page. I just added more embellishments around the photos and instead of 3 photos I used 4. They were small enough and I think it still works.
 What I wanted to do on this page is use an unexpected color palette. The cream and pale teal paper in the background essentially becomes 'neutral' on this page because the accent colors are bright green, olive green, and reds. I mixed several different types of embellishments to get a really quirky, shabby look for this page. I'm really happy with how it turned out! And now here are some closies:
 I loved this 'talk to me' sticker so I stuck it on top of a chipboard circle, then doodled and inked around the edges to make it a little more 'messy' looking. Also the tiny red crochet circle I got at Michael's.
 Another one of my favorite sayings....love this and the big red flower with the bright green 
button peeking out from underneath it ;)
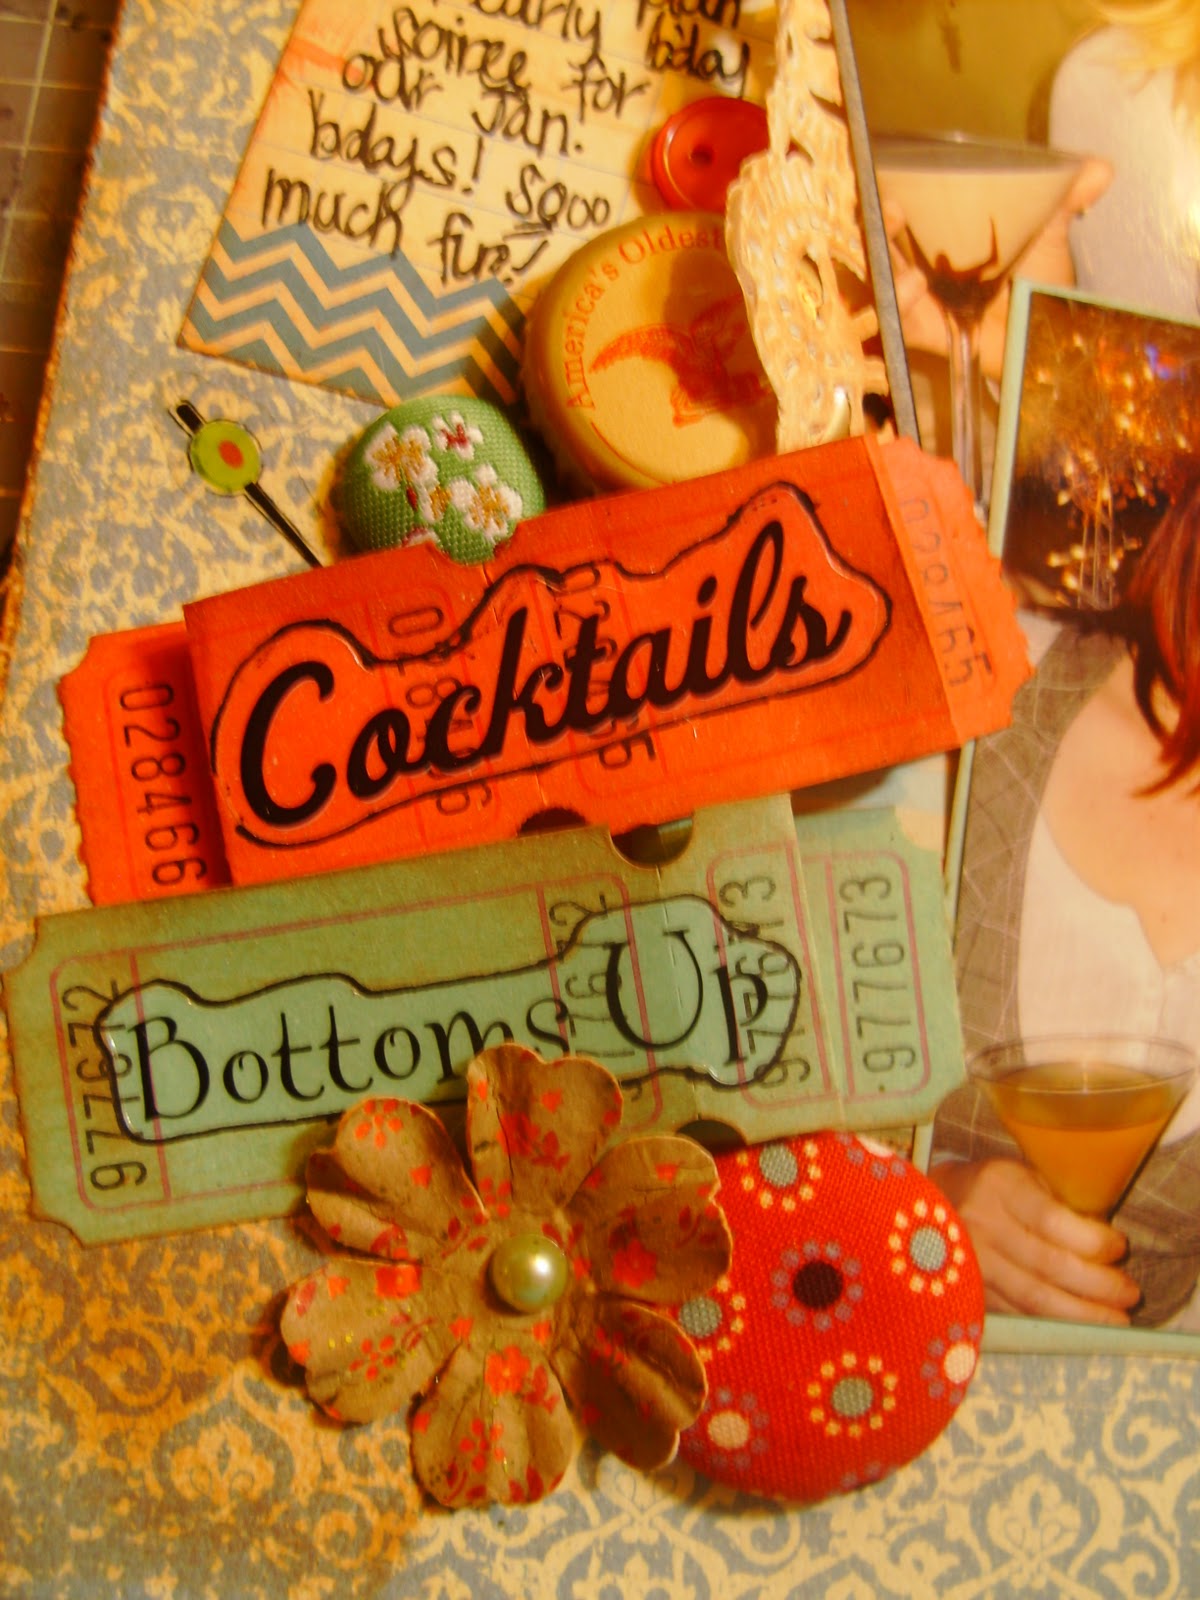
 I used some Purple Pumpkin tickets, which I put stickers on top of, then drew around them and inked them. Then I folded them up to give them more dimension. Also the red fabric button is PP.
 I think the most unexpected thing about this cluster of goodies is the bottle cap I stuck underneath the doily. I really like the idea of kind of the 'shabby vintage' look next to something like a regular bottle cap, I just think it's cool and really a neat juxtaposition.

Alright, that's it for tonite. Need to get to bed, early start tomorrow!
Until next time my scrappy friends, Peace y'all~ VV

Supplies List:
green plaid paper/stripe paper- Oriental Trading Co. 'Be My Neighbor'
Fresh Linens/Jean Blue paper- Jen Wilson 29th St. Market for MME
Tim Holtz distress ink in 'tea dye'
Tim Holtz distress stickles in 'peeled paint'
Tim Holtz paper distresser/ink blending tool
MME photo mats 'Home' collection
'congrats' layered tag- ColorBok
red pennant, chevron journal block- Elle's Studio
light green pearls, red crochet circle, green fabric button, paper flowers- Micheal's
red/green tickets- Purple Pumpkin Crafts
Med red fabric button- Purple Pumpkin Crafts
sentiment stickers, olive pick stickers, vintage buttons, bottlecap, drink stickers-stash
brown Zig writer
black felt tip pen
glue stick/ tape runner
Large Zots/ Pop dots