Search This Blog

Showing posts with label authentique. Show all posts

Wednesday, September 4, 2013

card + a secret


Good morning friends! Hope the start to your September has been good so far! I can't complain too much except that the next 2 weeks are going to kind of suck schedule wise, I will be working more hours than normal while one of the other managers at the store is on vacation. Which, in the end means more $ for me but it doesn't leave me alot of scrapping or fun time. So I have been trying to get ahead of the game and do all the projects I have due for September, including some challenges that I'd like to compete in. I meant to get going on them yesterday while I was off, but I was messing around with the look of my blog. I only meant to change the background and then I accidently deleted a whole bunch of stuff and had to spend 2 hours starting from scratch again so it wouldn't look weird! Well, for now it looks better I think it's not totally perfect and I will be adding stuff as I go, but for now it's a new look?!! What do you think?


So Frosted Designs new scrapbooking kit and supplies store opens in 2 DAYS!!! I am so excited to still be part of this team and be able to share some inspiration for all of the great new products we will be carrying. If you haven't already, please follow Frosted Designs on facebook and stay tuned to the BLOG for the launch of the new store in just a few days! The Design team has lots of fun challenges planned and we will be sharing up lots of inspiration for you every single day!!

Ok, so isn't that exciting? In the midst of all these changes, I was able to throw together a quick birthday card for my stepmom who's bday was August 27th and get it off into the mail to her along with a jar of my very first batch of homemade pear butter :) I hope she and my dad enjoy it! 


I had all these scraps from one of my favorite Authentique lines, and I knew I had been saving them for something special. I just love the color scheme, all I did was paste them around the card covering the blank white, then put large pearls for the flower centers. I also cut out another piece of yellow patterned paper that I stamped and inked and then pop dotted up. Under that I put a scrap of fabric, a vintage button, mini wood veneer camera, and a paper rose. I misted lightly over this and then started the inside with a bit of stamping and the back with paper and mist. All total, it probably took me about 20 minutes to make.


Well that is all for today. Check back in with me in a few days for more inspiration... Tim's Tag for September, more CSI case files, and of course new challenges for Frosted Designs!! Can't wait to share again:) Until next time scrappy friends~VV


Friday, October 5, 2012

Pieces of Portland {Authentique Enchanted Collection}


Happy Friday everyone! I hope you had a good week and are looking forward to the weekend. I wanted to just say that I had a FABULOUS time at Convention last weekend with all our customers and my special design team ladies! There were lots of laughs, plenty of snacks, and tons of inspiration! It was truly a great weekend, so thank you!
Ok, so I am sharing up with you today a layout I did using some of the new  Authentique 'Enchanted' collection papers, perfect for fall/Halloween/harvest. Even though these lean more towards Halloween, I was able to make them work for my fall pictures by grounding them with a dark brown cardstock background page. I had alot of fun using Sam's distressing tool on this layout, and I will be buying one very, very soon! Here are some pics:


I really liked both sides of all the papers I got from this collection, so I actually used both sides of all the papers by cutting them into different sized rectangles and piecing them together on my page. Of course before I glued them down I distressed and inked all of them. Also for each one of the rectangles, I did a different technique. I misted one with Smooch, I stamped one, I heat embossed/UTEE'd another one just to add more texture.

 Here are a few close ups, first up is my favorite, the BANNER! I have become obsessed with making these for my pages these days, don't know why! Could it be cause they are so stinkin' cute and easy to make?!! Also I added some mini pearls for a girly touch.

Next up is another new obsession on my pages... WASHI TAPE! It is so versatile, and it always adds just that bit of layering that you need. We have tons of different washi's available at the store now if you weren't able to get your hands on some this past weekend...come check them out! On this page I used 2 pieces near my stamped image.


And last is another view of the whole layout. I had so much fun making this one, if you like the papers I used be sure to check out the 'Enchnated' Collection by Authentique today at Scrapping Frenzy, it would be the perfect way to kick off your Halloween or fall project plans!


Until next time, enjoy your weekend! I hope you get a chance to scrap a bit this weekend and enjoy some laughs too!
Scrapping Frenzy Supplies Used: Authentique "Enchanted" collection- 'haunted' and 'glowing'. Echo Park- 'Note to Self' 6x6 paper pad. Dark brown, Kraft and cream colored cardstock. Colorbox chalk inks- chestnut, pumpkin spice, and black. Smooch Spritz by Clearsnap 'Pralines n' Cream'. Dylusions Ink Spray by Ranger 'melted chocolate'. Tim Holtz memo pens and Tim Holtz distress ink in 'tea dye'. buttons, washi tape, ribbon, raffia ribbon, and brown paper bag. Brown Zig writer, Glue dots, Sticky Thumb pop dots, watermark embossing ink.
Other supplies: 'UTEE' Ultra Thick Embossing Enamel, mini stick on pearls, flowers, Purple Pumpkin fabric buttons and crochet doily, fiber scrap from my stash.


Friday, August 24, 2012

Mt.Hood SNOW!

Hi crafty friends! Just sharing a layout I  finished 2 nights ago using some  brand new Authentique winter collection papers that I got at my LSS, Scrapping Frenzy. They are a winter-holiday themed set but I was trying to use them for something non-christmassy, and I think it turned out pretty well. Also I did a 2 page layout which I haven't been doing a lot of lately and I am really happy with how it looks. The soft color palette really let the awesome pictures shine as the 'stars' of my pages! So here are a few peeks. Sorry about  the not-so great pics. I was trying to get some mid-morning in my crafts room window before the sun faded, and the clouds were going in and out. 


 I was given 3 12x12 sheets of paper and half of an elements sticker sheet. I used 2 of the papers as my backgrounds and the other sheet I fussy cut some elements from and combined them with the stickers. To add some more subtle colors I used 2 other pieces of patterned paper from MME's 29th Street Market collection. Here are a few close ups of each page: 
 And some close ups of my clusters, sorry a few of the pics are blurry!

 This one for some reason is upside down! ARGH! stupid iphone. this one sits atop one picture that I layered  under it with a brown paper back, cheesecloth, some tickets from Purple Pumpkin, a resin embellishment, flowers, and vintage buttons. I really like the subtle color combo!
 Overview of 2nd page:
 Overview of page 1:
 Close up of shipping tag, a little blurry :( sorry!


 I really like this shot! It was a good detail one that turned out great with all the textures!

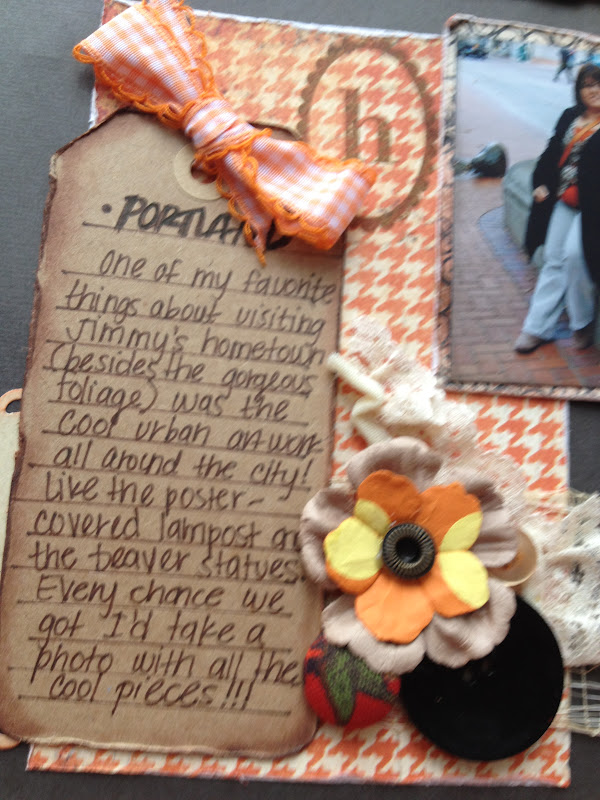
And that is all for today! I hope I inspired you to get scrapping this weekend! I really enjoyed scrapping these photos of my trip this past November to Portland, Oregon with my fiancee. It was one of the only times I've seen real snow on a mountain, since I've grown up in the South. I can't wait till we move there and I will get to have 'real season's all year round!!! I still have so many more from our trip but these were some of my favorite! Have a great day, until next time, PEACE Y'ALL~ VV

Supplies Used:
Authentique papers-'warmth' and solitude'
My Mind's Eye '29th Street Market'
Authentique sticker elements sheet winter collection
manila shipping tag
Tim Holtz paper distressing tool
Tim Holtz distress ink 'antique linen'
Tim Holtz distress stickles 'peeled paint' and 'pine needles'
Ranger stickles 'patina'
Smooch Spritz by Clearsnap 'emerald'
Colorbox fluid chalk inks- mint, ice blue, jade, and grey whale
flowers-Prima Marketing and Recollections roses
vintage buttons, paper bag, cheesecloth  and ribbon from stash
Resin elements by Jolee's boutique
sticky pearls and metal brads by Michael's
tickets by Purple Pumpkin Crafts
Thickers by American Crafts- 'Giggles'


Sunday, June 17, 2012

"Greetings from Delray Beach" ( I LOVE Authentique}

Good afternoon blogland! I am here today to share with you a quick project I did using the new Authentique  "Fresh" line available now at Scrapping Frenzy!! The mini cardboard travel case was given to me by a friend a while back as a gift at a crop we attended, and I have been waiting to do something fun with it! When I saw this paper, I instantly thought about these old photos I had of my 2 grandmothers back in the day..in their bathing suits! It was perfect and it will be a keepsake that I'll always have around to remind me of them. Okay, so on with the photos!!!

 For the inside of the case, there were several little compartments that I decorated differently. First I cut some plain white cardstock using the Cricut beach cartridge and made the sandollar border, which I then inked using Clearsnap's colorbox fluid chalk inks in grey whale, and azurite. After that I cut the border apart a bit and double-pop dotted it (is that an official scrapping term? LOL) with one sand dollar above the rest for dimension. Also I colored in the little sea stars with a gold paint pen.
 This is the inside top largest compartment. I covered the whole back with teal solid paper and then used some of the decorative tape to give it color. Then I layered another sand dollar, a vintage button from my stash, some red tickets, and an earring which I actually lost the other one to-tied with red baker's twine. I love using random things from around the house in scrapbooking! Then I put her initials next to a cute cabachon by Jolee's boutique.
This is a full view of all the compartments:

 Still my favorite shot, the front of the box which I did using the Authentique paper, an acetate frame by K&Co and some xmas red stickles. Of course I had to add textural elements, a paper flower, more sand dollars, some twine, and a button of course (i love buttons in case you haven't noticed)

 This is the side of the box which I did using the decorative tape and some stickles in Aqua.
 And the back of the case, I layered the Authentique paper and some red tickets.
 This is the case standing up!
 To go inside, I made this mini thing to keep beach things in, like little sea shells that you find walking along the beach. I used this magnet holder thing that I have been keeping cause I thought it was cool. 
 This is the back of the little case thingy.
 And the other compartment, using more Authentique paper and some baker's twine.

Okay, well that's it for today!!! Back tomorrow with some more fun stuff to share!! 
Until next time, peace y'all~ VV

Supplies List:
Authentique 'Fresh' line patterned paper
red/white and teal/white baker's twine by Queen & Company
white and turquoise cardstock
Clearsnap Colorbox fluid chalk ink- grey whale, dark brown, azurite
Tim Holtz distress ink-vintage photo, fired brick
Stickles by Ranger in Xmas red and Aqua
Cricut beach cartridge
red damask decorative tape-Micheal's
Tim Holtz paper distresser
K&Co clear acetate photo frame
Zig writer in brown
gold paint pen
red/teal cabachons by Jolee's Boutique
teal paper flower by Recollections
red tickets, leftover earring clear drop,& red vintage buttons from my stash