Search This Blog

Showing posts with label white. Show all posts

Saturday, August 17, 2013

Frosted Designs Fabulous Friday Challenge: Chipboard


Hello friends! I am here again to share my project for our bi weekly Fabulous Friday Challenge over at Frosted Designs! This time we are asking you to make any project, mini album, or OTP project using chipboard! This challenge should be really easy, especially since chipboard is one of my favorite things to work with! Share your project with us no later than August 29th to be entered into our DT picks for 'TOP 3" and also a very cool prize from our sponsor, Moments of Tranquility. We can't wait to see what you create!!

Now, for my share, take a look and tell me what you think!
 I loved combining some of my old embellishment stickers and flowers with some of my new Studio Calico wood veneer accents- all of the sailboats came from the travel pack, I also added Tim Holtz tissue tape, navy pearl brads, gesso, and some stamping. The little piece of stuff under the cream cardstock is a leftover scrap of some of my favorite seersucker pants that I had to cut up last summer, I don't know why but seersucker always reminds me of summer!


 To create texture on my page, I used several different pieces of cardstock that I distressed, inked, ripped, tore and layered. I also gesso'd some of the background before starting to lay down my elements. For the chipboard title, I inked, stickled and gesso'd over the title with Tim Holtz stickles in peeled paint. I also made a banner layering cardstock, navy ric rac, and chipboard along with some twine for the bottom of my page. 


And from instagram @khhollister


I used my color scheme and inspiration from case file #84 over at CSI. I have had kind of a mini scrapper's block lately due to stress at work, and these case files really help get the ideas flowing. For the evidence, I used anchor/nautical/stripes/twinetexture/circles. For the testimony, I used "tell about time together on a getaway" and was inspired by dream/write/explore. I also used the sketch as a jumping off point. 

I hope you will join us this week at Frosted Designs, we can't wait to see what you create! 

Friday, July 19, 2013

FDFF Challenge: The Great Outdoors!!


Hello friends! It's Friday again and you know what that means...another fabulous challenge over at Frosted Designs! This time we want you to create any OTP project, layout or card with the theme of "The Great Outdoors". Which should be easy right, it's summer so we all get out and enjoy the sunshine when we can. I happened to have done quite a bit of traveling this summer with our recent cross-country move so I had plenty of good photos to choose from. I actually printed 100 instagrams last week, most of them were from the trip, so I can't wait to scrap them all! It was hard to decide on which ones, I actually plan on making an 'entire 'road trip' album but I chose a few of my favorites for this layout I call "Wilderness Girls". It's kinda funny though we were all in Girl Scouts together back in the day, but it makes me think of that movie from the 90's about the Wilderness Girls...hmm I should find that on Netflix soon and save it for a rainy day. That was one of my favorite movies! Anyway, onto the good stuff, photos of my LO for today!!

 Here are a few close ups. I had fun digging back through my stash since the move. I did alot of purging when we left, had to make room for more important stuff, but at least I know it went to a good cause. I found some old BG out of print papers and combined them with more BG papers from a kit I bought just before the move called 'Clippings'. I thought the greens and whites went really well together. To do my layering, I used some Prima Trim, paper piecings, large flower, PP button, stickles, a bit of washi tape and a few other things to tie it all together. My photos aren't the greatest I took them at night so I had to brighten them a bit ...not too much light when you are up scrapping late at night like I usually am!!


 So that is about it for today, I hope you have a great weekend. I will be working but I get my 'weekend' Tues Wed so looking forward to getting back into a routine with all out of town company gone. It was fun to see them and show them our new place but the preparing beforehand can be so exhausting!!! Although it did motivate me to pretty much 'finish' out little place. All we are missing now is carpet for the bedroom, which will come soon I hope. I can't wait to share pics when the light is good in here in the next few days and everything is done!

Please come join us for this awesome challenge! All you have to do is link up your project on our sidebar at www.frosteddesigns.blogspot.com no later than July 30th to be eligible for the DT picks for Top 3 and our Grand Prize winner gets some awesome stuff from Molossi as well as Spiegel Mom's Scrap Shop- our  wonderful sponsors this time!! Can't wait to see what you come up with! Here's too a crafty weekend and normal routines :) Cheers! Until next time~VV


Sunday, December 16, 2012

2 wedding layouts + why I love UTEE

Good morning friends! I hope you have enjoyed your week so far! I know I've been enjoying this cooler weather we've had, it finally feels like Christmas is around the corner in Alabama! But this time next year I'll be in Portland, Oregon and I'll probably be dying for some warmer sunny days! LOL! I wanted to share a few layouts I did earlier this week for my sister's wedding album. I already gave her the album thinking it was complete, then realized that I had a few more pics and about 5 more pages to do!! So I finished them as soon as I could and shipped everything to her in a big box along with her bday gift, her bday was Dec 11th. I  forgot to take pictures of the other 3 layouts I did of some of her honeymoon pics in Virginia Beach, which makes me sad cause they were so cute!!! Oh well, here are the ones I did take pics of, I did a simpler style of scrapping cause I was in such a time crunch, but I still am really happy with how they turned out:


I also wanted to share a quick 'tute' about heat embossing. This has become my favorite technique lately. I have been using UTEE or 'ultra thick embossing enamel' but of course embossing powder comes in several different colors, even scented! What I like about UTEE is that it's thicker, and it's clear, so you can stamp your image in black or a color, then clean your stamp and cover it with TOP boss or another clear embossing ink, then go over it again with that. Next sprinkle on some UTEE and heat it! You can even double heat it for an even cooler look. I recently bought a clear embossing ink daubber, which is super easy to use if you aren't stamping, but wanting to cover a larger surface. By heat embossing some old chipboard shapes or stickers, it creates a cool new shiny embellishment for your page or project! I have even experimented with coloring my stamps with Tim Holtz distress markers as ink along with other colors to get each part of the stamp in different colors, then heat embossed it! Way cool, right?? Next for Christmas I want some colored embossing powder and more stamps!!!! Here are some step by steps on how I heat embossed some old chipboard shapes and gave them new life:

1. Choose your items, could be a thicker sticker, chipboard, or even cardstock shape.

2. Next, cover it with clear embossing ink, making sure to be very generous with the coverage!

3. Working quickly, cover your object with UTEE or other embossing powder.

4. Next, pull out your heat gun and give it some heat! You can lightly heat it for a more varied look or heat it longer and the little beads will melt together and make an overall enameled look.


Cool right? Well I will definatley be doing more experimenting, especially once I get more embossing powder and stuff for Christmas! So stay tuned for more craftiness!! I love this time of year! Happy weekend, Y'all~ VV


Saturday, December 15, 2012

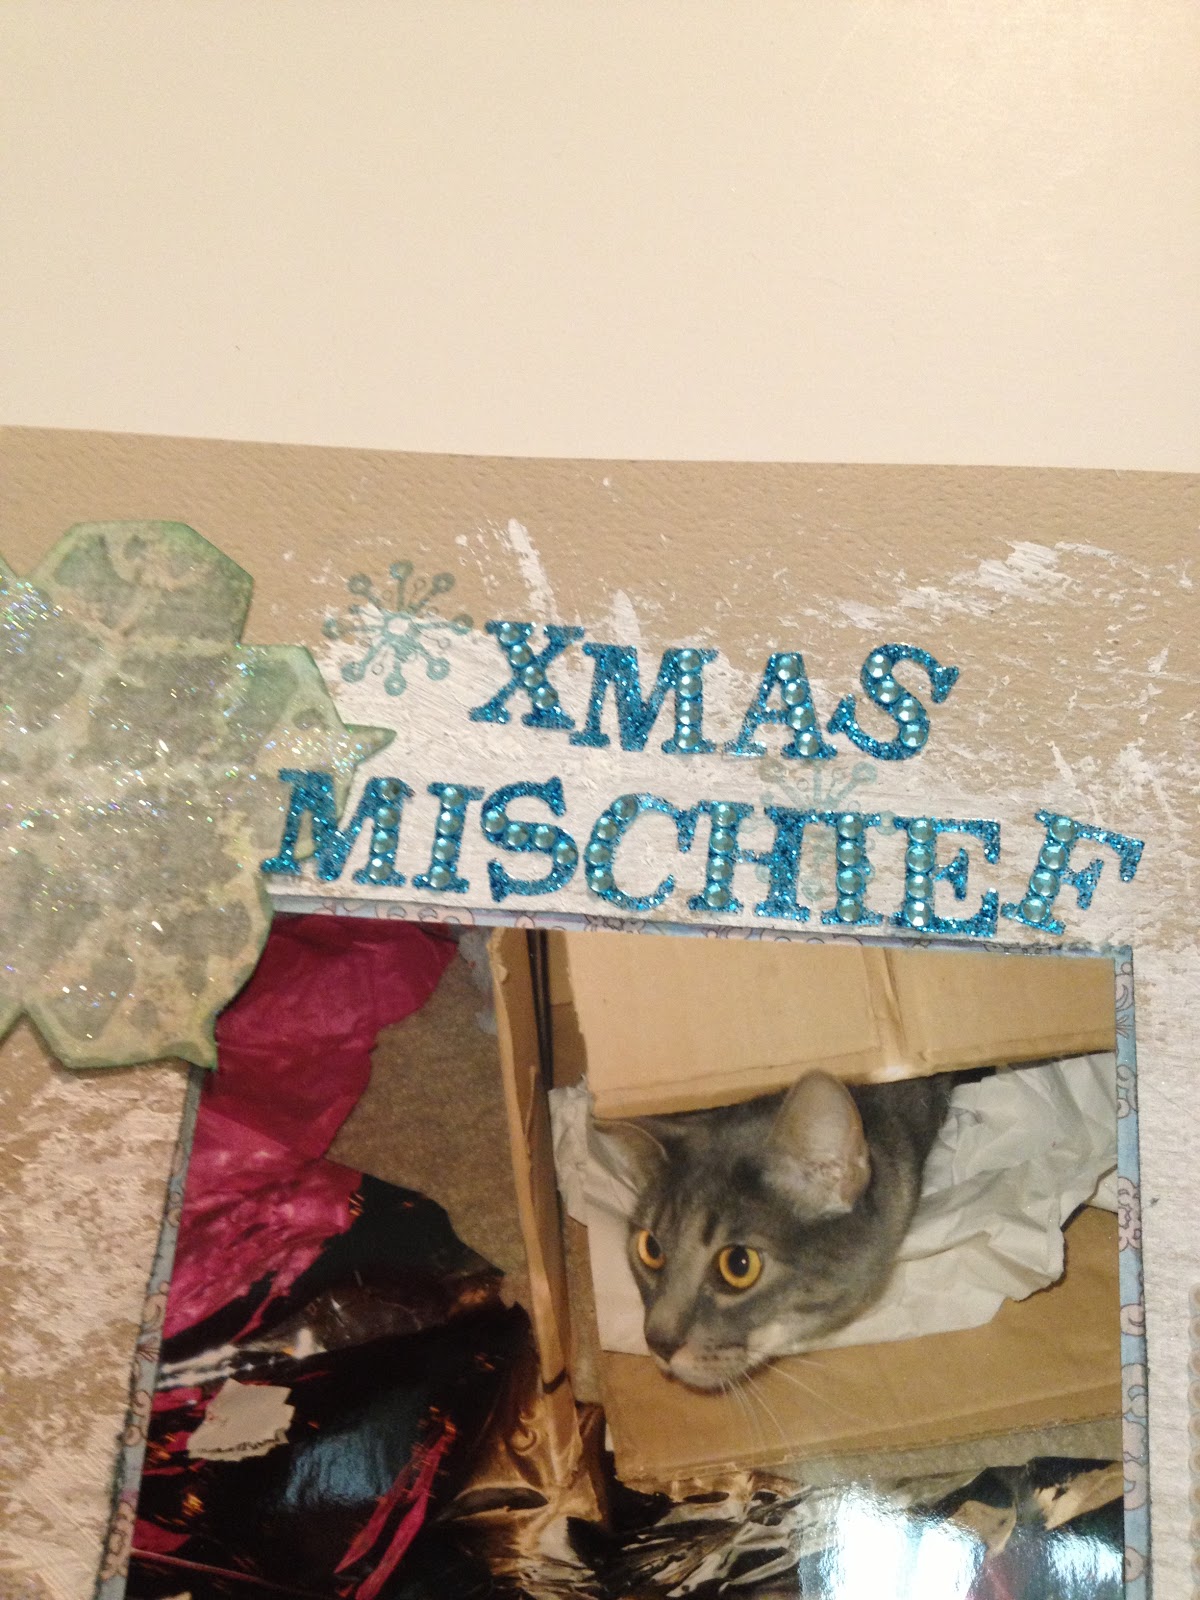
Xmas Mischief: Dec Sketch Challenge at SF!

Hi everyone! Just a quick post today to share of a layout I did for my LSS, Scrapping Frenzy, for our monthly sketch challenge. I don't have a pic of the sketch, but basically I turned in on it's side a flipped it a bit. I really enjoyed working with these new Pink Paislee papers, I chose the lighter blue and beige side of the one paper and some solid cardstock as my background. I had fun trying to make a 'snowy' background for these pictures of our beloved Carmella, digging thru the wrapping paper pile on Christmas morning. Forgive these photos, I had to take them inside that day since it was so wet and dreary out :) 
Here are some pics:


 I fussy cut some snowflakes from a scrap of christmas paper, then I glittered them and stickled some of them and used pop dots to pop them off my page. I had a tag from We R Memory Keepers that I tied with some ribbon and added to the page too. I inked it first with Colorbox chalk ink in mint and then outlined it with silver stickles. I also chose a few vintage buttons to add for dimension. For the patterned paper by Pink Paislee, I distressed the edged and used metallic blue Martha Stewart stackable ink for the edges. I also lightly spritzed it with Smooch Spritz in silver foil for a pretty shimmer.
 I added some rows of pearls and a few of my fellow DT member Laura's 'fork tie bows' 
in silver for a sweet touch. 


 The journaling tag is from the Authentique peaceful collection sticker elements sheet. I have so very few of them left... I love that paper line I might just have to buy some more!!! 
Ok, well that's it for today! Short and sweet! If you'd like to see my other design team member's take on the sketch of the month, head on over to www.scrappingfrenzy.com and check it out! Until next time, Peace Y'all~VV

Friday, August 24, 2012

Mt.Hood SNOW!

Hi crafty friends! Just sharing a layout I  finished 2 nights ago using some  brand new Authentique winter collection papers that I got at my LSS, Scrapping Frenzy. They are a winter-holiday themed set but I was trying to use them for something non-christmassy, and I think it turned out pretty well. Also I did a 2 page layout which I haven't been doing a lot of lately and I am really happy with how it looks. The soft color palette really let the awesome pictures shine as the 'stars' of my pages! So here are a few peeks. Sorry about  the not-so great pics. I was trying to get some mid-morning in my crafts room window before the sun faded, and the clouds were going in and out. 


 I was given 3 12x12 sheets of paper and half of an elements sticker sheet. I used 2 of the papers as my backgrounds and the other sheet I fussy cut some elements from and combined them with the stickers. To add some more subtle colors I used 2 other pieces of patterned paper from MME's 29th Street Market collection. Here are a few close ups of each page: 
 And some close ups of my clusters, sorry a few of the pics are blurry!

 This one for some reason is upside down! ARGH! stupid iphone. this one sits atop one picture that I layered  under it with a brown paper back, cheesecloth, some tickets from Purple Pumpkin, a resin embellishment, flowers, and vintage buttons. I really like the subtle color combo!
 Overview of 2nd page:
 Overview of page 1:
 Close up of shipping tag, a little blurry :( sorry!


 I really like this shot! It was a good detail one that turned out great with all the textures!

And that is all for today! I hope I inspired you to get scrapping this weekend! I really enjoyed scrapping these photos of my trip this past November to Portland, Oregon with my fiancee. It was one of the only times I've seen real snow on a mountain, since I've grown up in the South. I can't wait till we move there and I will get to have 'real season's all year round!!! I still have so many more from our trip but these were some of my favorite! Have a great day, until next time, PEACE Y'ALL~ VV

Supplies Used:
Authentique papers-'warmth' and solitude'
My Mind's Eye '29th Street Market'
Authentique sticker elements sheet winter collection
manila shipping tag
Tim Holtz paper distressing tool
Tim Holtz distress ink 'antique linen'
Tim Holtz distress stickles 'peeled paint' and 'pine needles'
Ranger stickles 'patina'
Smooch Spritz by Clearsnap 'emerald'
Colorbox fluid chalk inks- mint, ice blue, jade, and grey whale
flowers-Prima Marketing and Recollections roses
vintage buttons, paper bag, cheesecloth  and ribbon from stash
Resin elements by Jolee's boutique
sticky pearls and metal brads by Michael's
tickets by Purple Pumpkin Crafts
Thickers by American Crafts- 'Giggles'