Search This Blog

Showing posts with label buttons. Show all posts

Friday, October 5, 2012

Pieces of Portland {Authentique Enchanted Collection}


Happy Friday everyone! I hope you had a good week and are looking forward to the weekend. I wanted to just say that I had a FABULOUS time at Convention last weekend with all our customers and my special design team ladies! There were lots of laughs, plenty of snacks, and tons of inspiration! It was truly a great weekend, so thank you!
Ok, so I am sharing up with you today a layout I did using some of the new  Authentique 'Enchanted' collection papers, perfect for fall/Halloween/harvest. Even though these lean more towards Halloween, I was able to make them work for my fall pictures by grounding them with a dark brown cardstock background page. I had alot of fun using Sam's distressing tool on this layout, and I will be buying one very, very soon! Here are some pics:


I really liked both sides of all the papers I got from this collection, so I actually used both sides of all the papers by cutting them into different sized rectangles and piecing them together on my page. Of course before I glued them down I distressed and inked all of them. Also for each one of the rectangles, I did a different technique. I misted one with Smooch, I stamped one, I heat embossed/UTEE'd another one just to add more texture.

 Here are a few close ups, first up is my favorite, the BANNER! I have become obsessed with making these for my pages these days, don't know why! Could it be cause they are so stinkin' cute and easy to make?!! Also I added some mini pearls for a girly touch.

Next up is another new obsession on my pages... WASHI TAPE! It is so versatile, and it always adds just that bit of layering that you need. We have tons of different washi's available at the store now if you weren't able to get your hands on some this past weekend...come check them out! On this page I used 2 pieces near my stamped image.


And last is another view of the whole layout. I had so much fun making this one, if you like the papers I used be sure to check out the 'Enchnated' Collection by Authentique today at Scrapping Frenzy, it would be the perfect way to kick off your Halloween or fall project plans!


Until next time, enjoy your weekend! I hope you get a chance to scrap a bit this weekend and enjoy some laughs too!
Scrapping Frenzy Supplies Used: Authentique "Enchanted" collection- 'haunted' and 'glowing'. Echo Park- 'Note to Self' 6x6 paper pad. Dark brown, Kraft and cream colored cardstock. Colorbox chalk inks- chestnut, pumpkin spice, and black. Smooch Spritz by Clearsnap 'Pralines n' Cream'. Dylusions Ink Spray by Ranger 'melted chocolate'. Tim Holtz memo pens and Tim Holtz distress ink in 'tea dye'. buttons, washi tape, ribbon, raffia ribbon, and brown paper bag. Brown Zig writer, Glue dots, Sticky Thumb pop dots, watermark embossing ink.
Other supplies: 'UTEE' Ultra Thick Embossing Enamel, mini stick on pearls, flowers, Purple Pumpkin fabric buttons and crochet doily, fiber scrap from my stash.


Sunday, September 23, 2012

asian.elephant.@rt


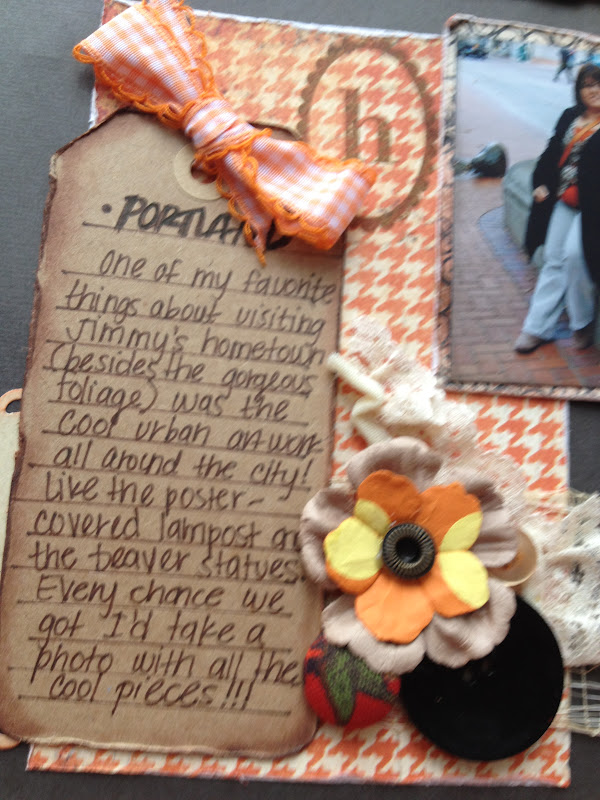
Happy Sunday everyone!! I am here today with a quick share of a layout I did using some more lovely Graphic 45 papers and Thickers for my LSS, Scrapping Frenzy . These are some more photos of my trip to Portland, Oregon with my fiance' in Nov. 2011. It is almost a year later and I am still scrapping them! Came home with over 200 pics from that trip! I was inspired by the swirls on the decoration of the elephant statues which were similar to one of the papers. I used another larger strip of more muted colored paisley paper to break up the polka dot background paper. I also backed my photos in dark brown and cream cardstock and inked all of my elements. Here is a look at the whole layout:


  used the orange and white dot paper from Graphic 45, as well as fussy cut some swirls out of the other paper by Graphic 45. To add dimension, I heat embossed the fussy cut swirls with UTEE. Also I layered another piece of dot paper by Graphic 45, some cheesecloth, a piece of shimmery beige cardstock, and a piece of seersucker fabric under my photos. I also cut a large circle out of cream cardstock and added a long strip of paper- scrap of Carta Bella paper from my stash for more color. Then I used flowers, buttons, and a few resin embellishments to make my clusters. Here is another shot:


 For the title, I used 2 different packs of Thickers, which are quickly becoming a fav! Alright well I will leave you with one more photo for today and that’s it! I hope you have a great weekend and enjoy this cooler spell we’ve been having!


Oh, and PS if you haven’t already signed up for the wonderful CONVENTION hosted by Scrapping Frenzy going on next week, it’s not too late!!!! It’s going to be a great time! Lots of fun classes and lots of inspiration from the design team of course! Call the store today to reserve your spot or check out our Facebook page to get all the info! It’s going to be alot of fun!!! I am excited to be teaching a class, also hang out time with some really great ladies and of course creative therapy... I need some 'me' time! Until next time friends, Peace Y'all~VV

Supplies: Graphic 45 papers, Carta Bella papers, cream and dark brown cardstock, colorbox chalk ink in brick, pumpkin, butterscotch. Smooch Spritz in tea party and pralines and cream. Sticky thumb pop dots, vintage buttons, resin elements by Jolee's, flowers by Prima, pearls by Michael's, scraps, fabric and cheesecloth from stash

Friday, July 13, 2012

A Lil' Girlie OWL ART!!!


Happy Friday!! (the 13th OOH spooky!)  I am here to share with you a special project that I did this month for Scrapping Frenzy! I used some of my leftover scraps of patterned paper, a little paint, a canvas, and just a little creativity! I had originally thought it would be kind of challenging to come up with something to make, and then I just started browsing through my scrapbook magazines. In the newest issue of Scrapbooks, Etc. this project was featured in the back! So I can't take full credit for the idea, but I did totally make it my own and add a few things! This little art piece would make a great gift for a girl's birthday and that is what I plan on doing with it, for my little niece, Zoe!
To start, this is the page that inspired me in the magazine:
So I started sorting through my scraps and I mixed and matched several lines of paper to come up with quite a colorful palette. I first cut out all the circles, distressed and inked them, then hand drew the eyes, and the top of the head with ears. I glued the top piece down first to a thicker piece of cardstock, then started layering my circles. I moved them around quite a bit until I was happy with the color arrangement. Last I glued down the eye piece on top of the circles and added a small triangle for the nose. This is what it looked like before embellishments:
The last pieces I did were the wings, which I hand drew basing them on the thicker brown wings from the magazine page. I glued them on top of the circles, then started layering on some feathers. I thought it would be a nice addition of more texture so I picked maroon, cream, and natural looking feathers and mixed them together to come up with the 'wings'. I first tried using glossy accents to adhere them, which didn't work, then a tape runner, and in the end I figured out that large glue dots worked best!! This is how it turned out after I added everything!!
I really wanted it to be colorful, so I chose 2 different colors of blue for my canvas instead of grey or white. also I layered some large dew drops and xl brown buttons for eyes along with a tulle bow to the flower. I tied the bow by hand and used my fingers to smear some stickles in 'tropical tangerine' over it to add some sparkle!
To the otherside I added a grungeboard butterfly covered with stickles and a mini chalkboard. I used Tim Holtz distress markers in 'picket fence' to write on the chalkboard but it didn't come out too clearly so I went over it with some old school puff paint!! LOL
So here is another shot of the whole thing! I am really happy with the end result, even after all my stressing :D and I can't wait to give it to my little niece!!
So I hope I have inspired you today to step out of your scrapbooking comfort zone of layouts and cards and make something really special for your family or friends! Scrapbooking supplies can always be used for something great, like wall art!! I am taking a personal day today to get ready for a DT meeting and private crop at Scrapping Frenzy, can't wait to see my friends and get the creative mojo flowing again! I'll be back soon to share some more lovely LO's from tonite (depending on how much I get done, LOL)!! 
Until next time, Peace y'all~ VV


Supplies: cream, white, pink, orange, and brown cardstock- Bazzil, misc. patterned papers including; Basic Grey 'Out of Print', Bo Bunny 'a Gift of Love', American Crafts 'Neopolitan' line, and Crate paper. Clearsnap Smooch Spritz in 'caramel mocha'. Colorbox fluid chalk inks- creamy brown, pumpkin pie, Ranger Stickles 'tropical tangerine', paper doily- Crate paper, Tim Holtz distress markers 'picket fence' and 'antique linen'. Large clear dew drops by The Robin's Nest,Tim Holtz paper distressing tool, Tim Holtz grungeboard, turquoise-colored tulle, large brown antique buttons, mini chalkboard, misc. feathers-from stash. large pink  flower- purple pumpkin crafts, Modge Podge, Folk Art Acrylic paint in 'calypso blue' and 'turquoise', mint colored puff paint, foam brushes, and square canvas from art supply store.


Monday, October 24, 2011

black&yellow......this ones for you CJB!


Hi everyone! I am in an exceptionally good mood tonight....for several reasons. For one, I just poured myself a nice glass of Merlot...for two I finished my LO for the Get Picky Birthday Blog Hop Challenge last night, and for three, I start my 10-day vacation in 9 days!!! YEAH!!! Can't wait for it to get here. This weekend we have a friend from Chicago staying with us so I have lots of little house projects to finish up...pretty much just cleaning and straightening...one major project I have left though is sewing couch cushions for our sleeper sofa that I have decided to recover. Hoping I can finish that tomorrow at work. Well any-who, enough of my babbling on. I did manage to finish this layout last night pretty late ( I think I was up until 2:30am) I don't know why I couldn't sleep...I went to Micheal's to exchange some stuff and I saw these cute satin yellow flowers with feathers and they really inspired me..from there I just pulled together a few new things and papers I already had and VOILA! A layout I'm extremely happy with! Especially since it features wedding photos I took at one of my best friends' weddings, Crystal and Chris :) on June 13,2009. I have been wanting to scrap them for a while just never really had an idea for them. I hope she likes the LO.... all I know is I freaking LOVE the color scheme...black, white, yellow, cream, brown, olive, and tan. It totally works and it's not a normal color scheme for a wedding layout. This was the original sketch from Get Picky, and this is what I did!

Here are some pics:

Basically I used the sketch above and added a third photo instead. Also my circle is smaller than the original sketch, but other than that I stayed pretty true to it. I added thicker paper strips along the bottoms of the photos as well. Other techniques I used are inking, and also for the fabric flower I made it from a scrap of fabric, twisting it around ( 2 long strips) then putting a large paper circle on the bottom with large glue dots to hold it together. I found that the fabric itself was a little too white, so I distressed inked it with Tim Holtz' in tea dye. Also I liked how the edges of it were kind of frayed. These pictures really don't do justice to how beautiful this LO is in person!!! Here are some closies:

I hope everyone enjoys their evening! I know I sure will...going to eat some of this yummy lasagna and salad and drink my wine while Jimmy watches the world series... then probably get going on another challenge!!! Feeling creative again after this post ;) Until next time my lovelies:) ~VV


Supply List:
Basic Grey Paper and stickers "Origins' Collection
1 Black paisley photo mat from Creative Memories Halloween 2010 pack
American Crafts- Elegant Vinyl Embellishments 'Townhouse' black&white
Jolee's boutique dimensional stickers- small yellow satin feather flowers
Colorbox Chalk Inks (cat eyes) Chestnut and Butterscotch
Tim Holtz Distress Inks 'Tea Dye'
Scrap of black&white damask upholstery fabric
vintage buttons
stick-on pearls
black tulle
white sticker letters- K&Company


Wednesday, September 28, 2011

123 challenge: one sweet love

Good evening, everyone! I know it's getting pretty late here and it's probably past my bedtime, but I've spent quite a bit of time lately blog-hopping. I'm really starting to get to know what is out there and what I love the most about the scrapbooking blog community is that is seems we're all sharers, scrap-lifters, inspirational women alike and most of all story tellers. I love all the inspiration I have been getting, and one day I aspire to be as great as some of those other more seasoned scrapbooking ladies out there! Here's to you gals ;)

So I decided that I would try out one of these challenges that I keep reading about everywhere. Since I am currently obsessed with The Purple Pumpkin, I figured I would try their September 123 Challenge. The rules were simple enough, use 1 Lollipop or Flower, 2 Doilies, and 3 Buttons. Easy enough, right? Well this is what I came up with tonight:


 I used my last full sheet and scraps from Basic Grey's "lemonade" line. I absolutely love this line, I bought it last year at a weekend long crop and I have used every single scrap of it!! For the rest of the paper scraps layered under the photo, I used one aqua colored photo mat from the My Mind's Eye 'Home' photo mat collection and then a scrap of craft colored card-stock that I cut into a journaling block. All of the papers I inked with a colorbox chalk in dark brown. I used my creative memories tear tool to tear the long strip of paper and for the aqua paper I tore it by hand on all edges, ripping it in one place which I then wrapped around the barrell of a pencil to make it curl up. I inked all the torn edges really really well to give it that vintage look. 

For the embellishments around the photo, I used 2 doilies and 5 paper flowers all from Prima, the 'love note' and 'sweet taffy brown' collections. On the flower centers I used some  vintage buttons from my stash, as well as 2 pearl brads. To add another element of texture, I added a scrap of pink fuzzy ribbon from my stash as well as 2 brown metal brads to the 'sweet' part of the title. For the bottle cap embellie, that was from an experiment a while back when I was trying to make some kind of necklace. It went awry and I decided not so much for a necklace, but maybe a scrapbook page. It's a regular bottle cap that I put patterned paper in, added some beads, and filled with liquid glass. I decided to use it on this page cause the colors kind of go. The last thing I did to add depth is go over the sticker letters in the title with liquid glass to make them pop. I think it turned out really well overall and only took me about 45 mins to do! That must be a record for me! LOL! Anyway, I am submitting this to the 123 September Challenge over at Purple Pumpkin. It ends September 30th, so you still have a few days if you want to submit something and win a fabulous goodie! 
Until next time my lovely ladies~ VV